Monday, August 29, 2011

Blocking and Squaring

I have mentioned Ann Fahl’s book “Dancing with Thread” before.  In it I was also introduced to the importance of blocking your top and your quilt prior to squaring it up.  I have used her method ever since, although I have read about others.
Why block?  Well, sewing of any type will distort fabric.  So the blocking gives you a chance to get the fabric back to its original shape (to a certain limit) and to get everything to lie flat.  If I have done complex piecing, I might block the block or a section of blocks.  After quilting, where there is even more draw up, I will certainly block.
So here’s how to do it.  You will need one or more of the cardboard cutting mats that most big box stores sell for anywhere from 7 to 10 bucks a piece.  You’ll also need some sturdy sewing pins and perhaps a tape measure.  While you can use the lines of the cardboard, depending on how crooked the edges are, you may need to double check the measurements.
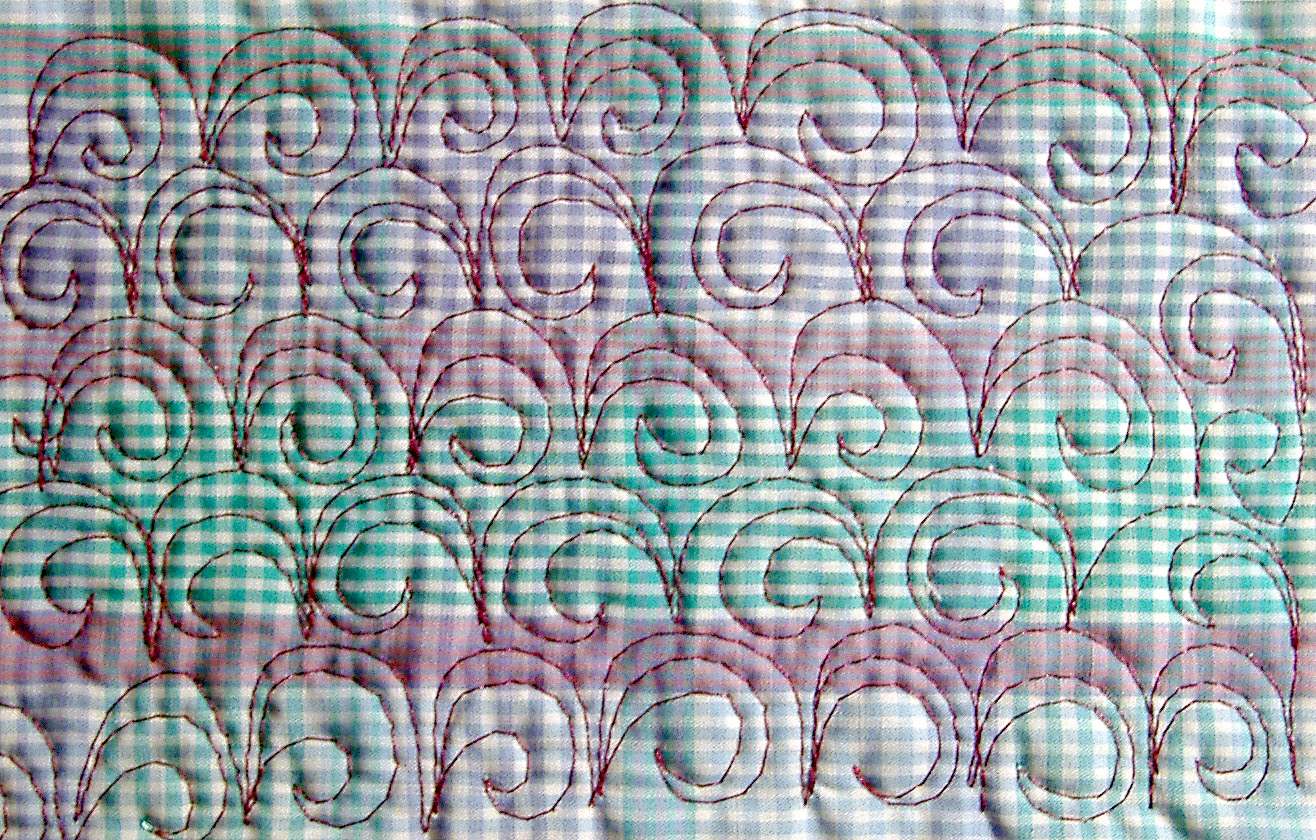
First trim up the quilt to within ½ inch of what will probably be the final edge.  While you don’t need to be super precise, don’t be too sloppy either.  Lay out the cardboard on the floor close to an electrical outlet.  Lay the quilt on top of it and align one of the edges (whichever one looks straightest) with a line on the board.  Pin this edge down to the board by inserting a pin with the head slanted outwards about every 4 inches.  This edge should be pinned to the final dimension the quilt was supposed to have, but don’t force it, if it requires a lot of stretching.  At this point I sometimes will pin the opposing corners to the final dimensions and then ease/ slightly stretch the adjacent sides and then finally the opposing side.  This may take a bit of futzing and measuring.  When done the quilt should look right and be flat. (Photo 1)
Photo 1: A quilt pinned to the cardboard, ready for the steam treatment.
 Now take a fully loaded steam iron set on high and hover about ½ to ¼ inches above the quilt.  Go all around the quilt several times – the surface will be damp.  Do not touch the quilt with the iron – you are using the heat and steam to relax the quilt into shape.  This also makes this technique fairly safe for embellishments that cannot take heat.  Hover higher, if you must.  Let the quilt dry several hours to overnight.  When you remove the pins, nothing should move!  If it does, do it again.
Once the quilt is dry, it’s time to square it up.  Here a larger ruler and a tape measure come in handy on larger quilts.  Robbi Joy Eklow (video) uses a plastic ceiling panel that comes a size of 2 foot by 4 foot.  I intend to try one of those.  She recommends using a laser pointer to show you the way, once you have determined what the dimensions should be.  It works great! (Photo 2)  Setting the first line in a bit tricky.  You have to determine which side is straightest (that’s where a border seam is helpful) and get that trimmed first.  Then everything else should be squared to that.  After that I set up my laser marker, place a rotary cutting pad underneath the quilts and start carefully cutting along the red line.  So far I haven’t screwed up a quilt doing it this way.  Occasionally I will cut once just beyond the final line, recheck things and then cut a second time.  Depends how wonky the edge and everything seems to be.  You know your quilt is squared correctly if the diagonal measurements are equal!
Photo 2: tape measure and laser marker help define where the trimmed edge should be.
 Once you have blocked and trimmed, you can rest assured your quilt be true and lie flat after adding the binding.

You can block a block, set of blocks and a top the same way – just be really careful not to stretch any exposed biased edges!  This will ensure that the quilt will probably need little coaxing to lie flat after quilting.  Unless I am blocking a subset of blocks that will still be pieced, I don’t trim any edges until after quilting.

The other cool thing about the cardboard – it’s great to use when pin basting a quilt.  Pin down the backing to the board, lay the batting on it and smooth out and then add the top.  Now you can pin away, knowing that the pins won’t scratch any surface underneath, especially if you decide to lay the cardboard on a table.  You can place multiple boards together – I use some masking tape to hold them together.

Monday, August 22, 2011

Quilt Challenge

Well, I was going to write about something else, but yesterday I got an email from Leah Day that congratulated me on being a finalist in her Transformation Quilt Challenge.   Needless to say I am stoked!

Leah Day is one of the quilters I follow – her tutorials, approach to quilting and her free motion quilting designs have been most inspiring.  So when she announced the challenge to make a 9” by 11” quilt around the theme transformation and using at least 5 of her quilting designs, I thought I would give it a shot.
 
The adage to beginning writers is to write about what you know – I would say that’s true for art quilters as well.  I am a forester by profession and I love trees, forests, leaves, flowers.  I have now made several quilts using leaves (Photos 1 -3), so I decided to express the wonder of the ever changing seasons as displayed by changing leaf colors.

 
Photo 1: Spring Leaf Dance.  The background material is fabric I painted.


Photo 2: Maple Leaf Runner.  Experimenting with Ellen Lindner's double reverse applique technique.

Photo 3: Persistence.  Made in an online class with Ellen Lindner.

Another quilter whom I admire is Robbi Joy Eklow.  In her book Free-Expression she has a tutorial on making a type of quilt called a puzzle quilt, which consists of overlapping objects.  The overlap is a different color from the two (or more) objects.  Instead of vases and bowls she shows, I elected to use leaves.  

So I started by making one quilt using commercial fabrics (Photo 4). The leaves are aspen leaves I collected, scanned and printed out. The result was nice, but lacked something.  I have been painting fabrics for a while and decided to try again using fabrics I had painted.  It has a much fresher look and that is the piece I submitted.  Photo 5
Photo 4: Seasonal Transformation using commercial fabrics.
Photo 5: Seasonal Transformation using my painted fabrics.

Since then I have made a third piece, tentatively called Leaf Pile. (Photo 6)  This quilt is poster sized and I used leaves from white oak, red oak, sugar maple, tulip poplar, Boston ivy and aspen.  These leaves all grow in the park I live on or in my yard. The fabrics are a mix of commercial and painted. I haven’t quilted it yet – still deciding exactly what to do. It was much more involved to create this piece, but very fun and I like the results so far.

The other finalists entered some beautiful pieces and only half will be selected as winners, so I am not getting my hopes too high.  But just to get a nod from Leah is already a huge boost!


Photo 6: Leaf Pile.  Yet to be quilted.

Monday, August 15, 2011

Some thoughts about piecing


I am in a couple of Internet based bees and swaps.  It’s my first time joining something like this and overall it has been fun.  In the bee, I sent out material and instructions and the members sent me back the finished blocks.  I have to now assemble them into a quilt.  They also made some border blocks for me.  (Photo 1)
Photo 1: My bee block and partial border blocks
What has surprised me is the range of seam allowances and the use of thread.  One block looked dirty when it arrived – but the reality is the contributor used dark purple thread, regular sewing weight, which I assume is 30 or 40.  The “dirt” was the purple color burning through the lighter fabrics.  Where the seam allowance had been pressed open, the thread really shows.  Every reference I have read has stressed using neutrals for piecing.  I use white, cream, light gray or light beige for piecing. I use black, if the fabrics are very dark. I have grown to love Mettler’s Metrolene (now called Seralene), which is a polyester 120 wt thread. (Photo 2)  That in a 70/10 topstitch needle and a stitch length of 1.5 yields a very strong but almost unnoticeable seam.  Yea, if I have to tear it out, it takes some patience, but a good quality seam ripper works with it just fine.
Photo2: Seralene (metrolene)
 
So many places want you to use a scant seam.  WTF is a scant seam?  Anything open to interpretation makes consistency a problem.  I like Sally Collins approach: cut fabric using the entire width of the ruler lines, which will account for seam thread width.  That combined with Seralene, and stuff just comes out dead on, if I have paid attention while cutting and sewing.

Speaking of the seam allowance.  I went to school for a while in Germany.  My sewing teacher there drummed it into us that a machine in good working order will sew straight.  The sewer is the cause of crooked seams.  So I handle everything with a light touch.  A ¼”presser foot really isn’t enough.  In order to make sure I feed the material in correctly, I have taped 2 seam guides to my sewing area using ½”masking tape.  (Photo 3).  The inside edge of the left hand piece is the needle position, the inside edge of the right hand piece is at ¼ inch.  The black line is at ½”, the outer edge of that is at ¾”.  That way even large pieces or angled pieces are lined up and fed correctly. I press my seams open: the results lie flatter and matching is easier.  That’s part of the reason for the very short stitch length.  However, I still have a problem with the seam ends opening, so I make one or 2 backtrack stitches.  They aren’t hard to open, if needed, but hold everything closed until the next seam is sewn.  Not every seam gets pressed opened.  On narrow borders I tend to press towards that border to make it stand out.  When using very light colored fabric, I also tend to press towards the darker fabric.
Photo 3: Guide lines for sewing using masking tape.
Sharon Schamber stresses that most iron surfaces are over padded and make it hard to really press seams correctly.  She recommends making your own ironing surface, which I found easy to do and cheaper than commercial ones.  My surface measures 2 feet by 4 feet – not too wide but long enough for a normal width of fabric.  I first laid out a piece of canvas that was about 2”wider all the way around than the plywood.  Over that came a piece of cotton batting the same size as the plywood and on top of that I laid a piece of 5/8”plywood (You can buy these pre cut at most larger home improvement stores.).  I then stretched the canvas tightly and stapled it to the plywood.  When it gets too messy with thread and bits of fabric, I use one of those red lint remover wands.  If the canvas gets too gross after a while, it’s easy to replace.  Don’t use plywood less than ½” thick as it will warp from the steam and heat of the iron.  It fits perfectly on my work table and can be quickly put away, as my sewing room is also the guest room. Photo 4. 
Photo 4: My work table with homemade ironing surface.

Sunday, August 7, 2011

What I have figured out so far about quilting.


In June Leah Day wrote an excellent  blog on her thread preferences.  I pretty much agree – I love Isacord.  It holds tension well and has a nice sheen that enhances the design.  I also think Sulky falls into this category and their selection of variegated thread as well as the ability to get smaller spools for when you only need a bit of a color is great.

The bobbin thread is for me still an issue, sort of.  Leah recommends using the same thread in the bobbin, preferably the same color. It  helps with the tension issues, any thread pop ups are unnoticeable and the machine likes it better.  

However, that doesn’t always happen.  I currently am working on a quilt that is very different in back than in front – it’s meant to be reversible.  The person who commissioned the quilt wanted me to use cotton thread.  Ugh.  It’s been a royal pain, not to mention the prodigious dust bunnies that collect in the bobbin area;  I have to clean it out with every bobbin refill.  It shreds and if I vary my speed (machine or hand) the tension reacts poorly.  I am hoping that washing will help even things out a bit. In fact I have come to hate cotton thread for quilting – I have tried Guttermann, Essential, Robison-Anton and Mettler and I just have a hard time making it behave consistently.  Maybe I am still too much of a novice.  I also hate the lint it produces in the bobbin area.

I really like to use clear thread in the bobbin. Ann Fahl’s book Dancing with Thread  suggests this option.  It allows you to change colors on the top with no color change on the back.  It does not show through the front.  It is thin, so a spool holds a lot of thread.  Because it is a bit stretchy, you may have to increase the top tension.  I have a Janome and I have to crank the tension to about 6. However, if you are using a dark thread on top and the quilt backing is light colored, it’s still really hard to not have thread heads show on the back.  It comes as polyester and as nylon.  There’s some debate about whether nylon will become brittle and discolor with age, but since you can get a clear polyester (Sulky makes a good one), why bother?  That way, you are using the same composition of thread in both top and bottom, which helps with controlling tension.  I talked with one lady, who used to service Bernina sewing machines.  She said that nylon is tough enough to actually wear grooves into the bobbin case!  Not so with polyester.
Superior makes bobbin thread that I have had good luck with and Isachord and Sulky do fine as bobbin threads.

There has been some debate about whether polyester will cut cotton.  There is a great discussion that debunks this as a myth.  

Another must have or at least must read resource is Threadwork Unraveled.

Needles are another consideration.  I have pretty much settled on using topstitch 80/12 for most of my quilting.  Occasionally a 90/14 topstitch is warranted and a 70/10 can be used with very fine threads (like if you were to use clear both top and bottom).  The topstitch needle has a deeper guide groove, so shredding is usually not an issue.  Sharps are also good.  I haven’t had much luck with universals.  I just use topstitch needles for everything including piecing.  I change needles about every 2 to 3 bobbins worth.  Here’s how I stash my various sized needles that are still good:

This is a stick on magnetic strip labeled with sizes.  My sewing platform slides over this and keeps the needles out of the way until needed.

Finally the big bugaboo: Tension.  You just have to experiment.  I am coming to the conclusion that you need to always do some quilting on a test piece every time you start, with every needle change, with every bobbin refill and with every top thread change. I also think that weather changes (humidity, etc) cause the thread to behave differently. 

What to do about the ends?  Well, I have seen everything from just clipping them to meticulously knotting and burying them.  After having had to rip out a fair amount of quilting so I have seen what seems to hold and what doesn't, I have settled on starting and ending with some very small stitches that lock the threads.  I pull the bottom thread to the top both when starting and finishing.  I then just bury the ends – rarely will I knot.  I use a large needle that has a loop of thread tied to it.

The needle with thread loop and my second helper needle.  I use small embroidery scissors to clip the loose ends after they have been pulled through.
I insert the needle exactly where the threads come out and exit about 1 to 2 inches away and pull it through until a small amount of the loop remains.  I use a second needle to help me pull the thread ends through the loop.  Then I just pull the loop the rest of the way – the ends are pulled along.  I tug on them and clip them off.  I have seen self threading needles suggested, but for me, the ends got shredded too often.  I like the loop system better.

With every piece I quilt, I learn more.  I can see the progress and hope that it continues!

Tuesday, August 2, 2011

Free Motion Quilting Fun

When I first started quilting, the quilting part was the most daunting aspect.  I had hand quilted one piece - took forever.  However, machine quilting seems to be all over the place - some very formal and other completely haphazard.  I think I am some where in the middle, although my skills level leans to haphazard!

My biggest inspirations have been Leah Day, Robbie Ecklow and Ann Fahl.  I study their work and of course Leah has had this fantastic website to show you all the cool designs you can do with videos on how to do them.

I have discovered that place mats are a great way to practice and try out new designs before committing yourself to a larger project.  So this morning I finished quilting a place mat.  I tried out Leah's Spiral Paisley, some McTavishing, a feather and some echoed C's (I think another one of Leah's designs.)
A detail of the back of the place mat to show the quilting.

 For the border I came up with a spiral inside a clam shell.  While I only did a single row of it, it can be expanded into a filler.  Below is a practice piece.  I still haven't quite figured out how to elegantly go to the next row, but I'll work on that.  You start by making the spiral and echoing back to the beginning and then doing the clam shell outside of the spiral.

Spiral Clam shell
Here's the final result - I used a variegated thread by Sulky that went from purple to green.
The final place mat.

I have a long way to go to get really good at this, but it is coming along and I love it.